

In my previous article, we looked at platform engineering: what it is, how it became a thing, platform engineering vs. DevOps, and how it could help improve security. If you haven't read it yet, here it is:
Platform Engineering and Security: A Very Short Introduction
Today, let's get hands-on and build a developer portal from scratch!
1 What Are We Talking About When We Talk about a Developer Portal?
Since platform engineering is all about self-service, the internal developer portal is crucial. It's the single place where all the self-service capabilities and integrations are added. Figuring out exactly what we are expecting from it is important before building one.
A developer portal would typically contain these key features to get the most out of platform engineering:
a service catalog: giving developers a bird's-eye view of all the projects, services, deployment status, documentation, ownership, and even on-call schedules and incidents;
some repository scaffolding/project generation tool: for example, something like cookiecutter, which enables developers to spin up new services from within the portal itself;
custom toolchain: you might want to integrate whatever toolchain you use into your developer portal to make it a genuinely unified one-stop experience. Possible integrations include Kubernetes, CI/CD service providers, a secrets manager, etc.
At this point, the portal can handle everything, like getting information about the services' status and triggered incidents, but also deploying things and dealing with incident management. With these features, developers can have a truly unified experience where creating services and subsequently keeping track of and operating/maintaining those services in one place, maximizing the potential of the platform.
2 Choosing the Tool: Backstage
Now that we know what we really want from a developer portal, let's build one.
Since it will have multiple features, the designing/coding part could be a massive project in itself, and not all teams could afford that. To avoid starting from scratch, we need a tool for building the portal for a quick start, and luckily, we've got one: Backstage, an open platform for building developer portals. Think of "create-react-app", but for platform engineering. Out of the box, Backstage includes:
a catalog for managing all your software, such as microservices, libraries, data pipelines, websites, and ML models;
templates for quickly spinning up new projects and standardizing your tooling with your organization's best practices;
docs for making it easy to create, maintain, find, and use technical documentation using a "docs-as-code" approach;
a growing ecosystem of open-source plugins that further expand Backstage's customizability and functionality.
Its architecture is very flexible: mostly based on Typescript for the frontend (React) and the backend (Node.js), its power is easily extendable by adding plugins, which we will probably cover in the second part of this tutorial.
What's more, Backstage (created by Spotify) is now hosted by the Cloud Native Computing Foundation (CNCF) as an Incubation level project, meaning you can get all the community support you want. You can even ask for help during its office hours, where you can join interactively to learn precisely how the open-source platform can drive better developer effectiveness and experience every Thursday.
Enough said; today, we will start from scratch and build a developer portal ourselves. After this tutorial, you will be able to bootstrap a new service using templates with baked-in-security CI workflows and check the CI status and the documentation for that service in the same place.
Without further ado, let's get started!
3 Building The Portal
3.1 Prerequisites
Not much; probably all DevOps engineers already got them:
A Unix-based operating system. For example, you can run this on macOS, Linux, or Windows Subsystem for Linux (WSL).
curl,git,DockerNode.js,yarn
3.2 Creating the Portal
Run:
npx @backstage/create-app@0.5.2-next.3
Author's note:The reason we use
backstage/create-app@0.5.2-next.3instead ofbackstage/create-app@latestis because we need a special feature to create secrets in GitHub to later be used in GitHub Actions workflows. This feature has been developed, but as of now (June 18, 2023), it's not yet integrated into the latest version ofbackstage/create-app.If you read this article later when the
latestversion points to a version released in June 2023 (or later), you can confidently runnpx @backstage/create-app@latestinstead.
This command gives you an interactive mode where you need to enter the name, for example, "my-portal," press enter, then wait till the app is finished.
Enter the directory, and run:
yarn dev
You should now have the portal up and running! It's that simple. Now, you can poke around with it for a bit and have a feeling of the software catalog, templates, documents, and stuff there:
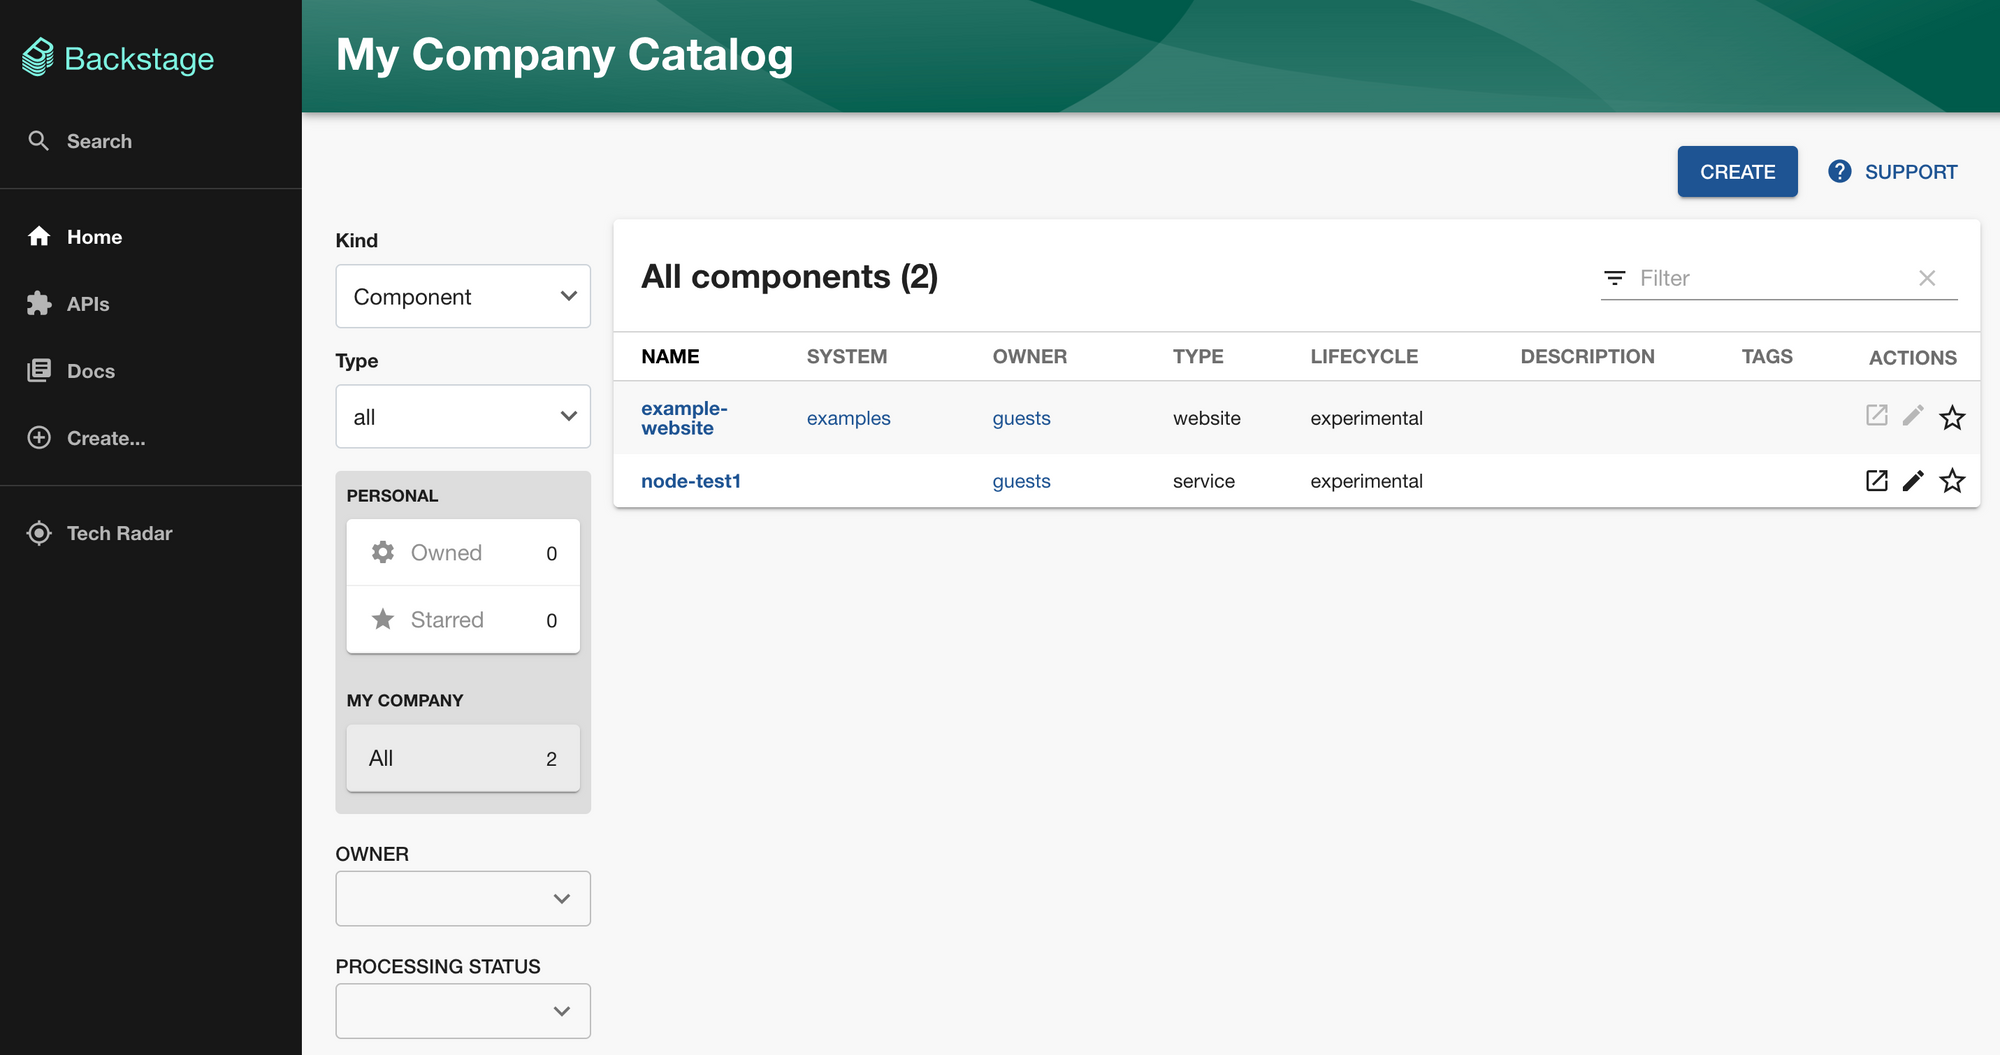
But, at this moment, it's not of much use yet. So, let's continue configuring it.
4 GitHub Authentication and Integration
Since the developer portal will be in charge of bootstrapping new repositories, it requires permissions to operate GitHub, and that's why we need to do a GitHub authentication and integration.
4.1 Personal Access Token for Integration
While using GitHub Apps might be the best way to set up integrations because of its fine-grained permission settings, for this tutorial, we'll use a Personal Access Token for a quicker start:
Create your Personal Access Token by opening the GitHub token creation page.
Use a name to identify this token and put it in the notes field. Choose the number of days before expiration.
If you have a hard time picking a number, go for 7 days; it's a lucky number :) (And we will only be testing it locally, not running in production.)
For this tutorial, let's set the scope to the maximum so that your experience won't be blocked by struggling with GitHub permissions. Please note that you should NEVER do this in production!
Then export the token as an environment variable:
export GITHUB_TOKEN=xxx
In the app-config.yaml file, change the integrations section to the following:
integrations:
  github:
    - host: github.com
      token: ${GITHUB_TOKEN} # leave it like this to read the value from the environment variables
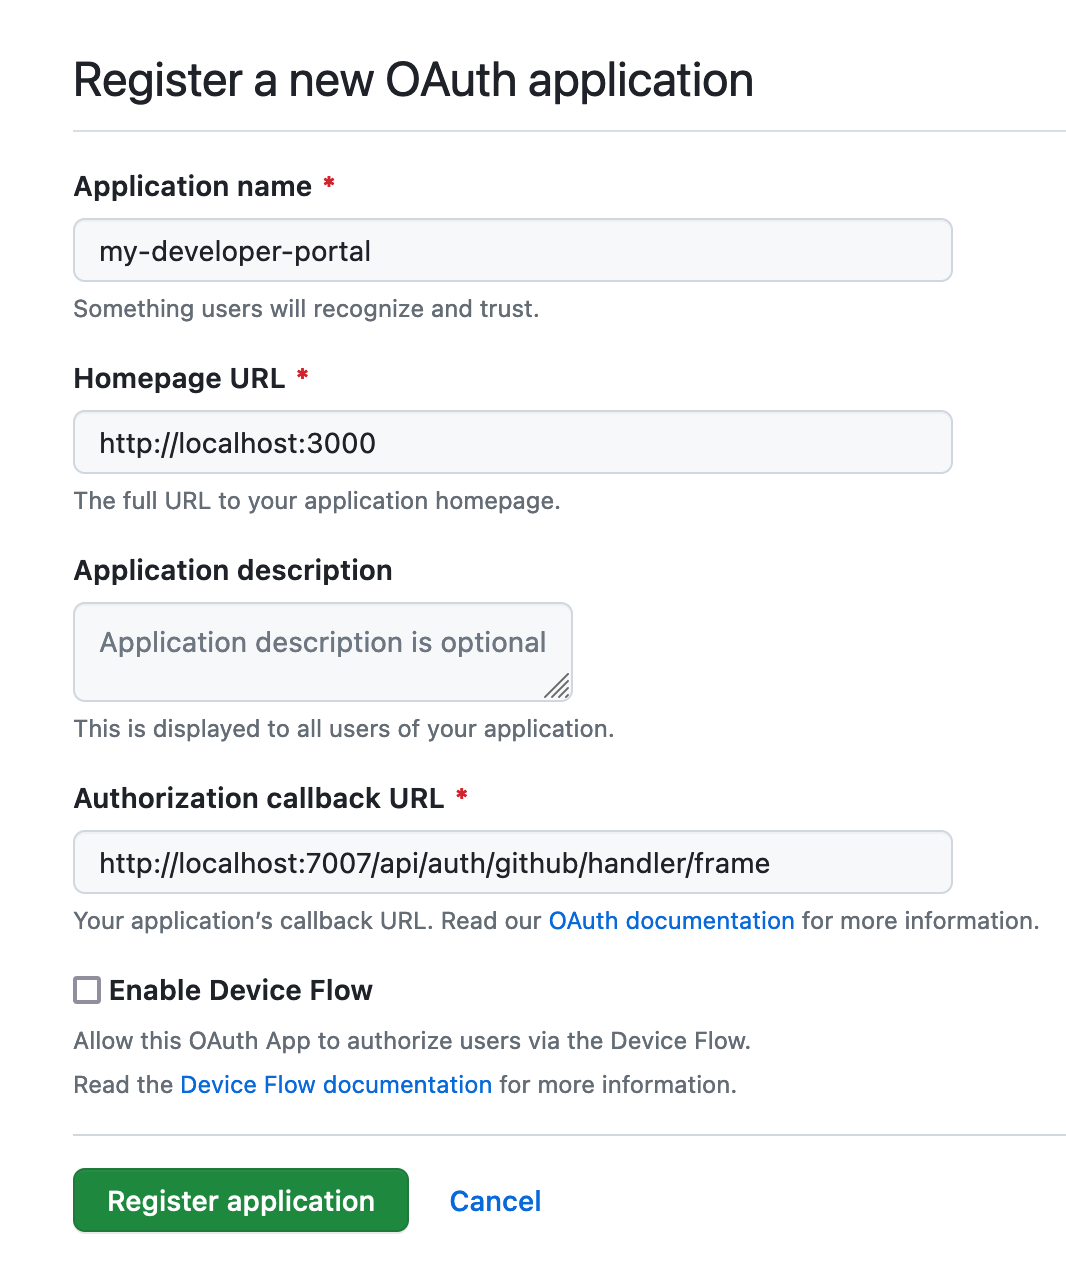
4.2 Creating a GitHub OAuth App
Go to https://github.com/settings/applications/new to create your OAuth App. The Homepage URL should point to Backstage's frontend; in our tutorial, it would be http://localhost:3000. The Authorization callback URL will point to the auth backend, which will most likely be http://localhost:7007/api/auth/github/handler/frame.
Then, let's open our app-config.yaml file again and configure the authentication by updating the auth section to the following:
auth:
  environment: development
  providers:
    github:
      development:
        clientId: YOUR CLIENT ID # put your values here
        clientSecret: YOUR CLIENT SECRET # put your values here
⚠️
Please note that storing the client secret in the config file as a hardcoded secret is against security best practices and should only be used for local development. Also, avoid checking these secrets in revision control. For production, the secret should be managed through a service such as AWS Secrets Manager or HashiCorp Vault.
After these config changes, we must stop our yarn dev servers and re-run yarn dev.
5 Creating a Template
Next, let's prepare a software template, which could be used to bootstrap a new service in no time. The template should contain the following:
some basic source code/directory structure common to your services
some documentation
some CI workflows to test/build/deploy your service
For this tutorial, we will use this template that I created as an example. The directory structure is relatively simple; there are only two parts:
a
skeletonfolder,a
template.yamlfile.
5.1 The skeleton Folder
The skeleton folder contains all the templates that will be rendered when using this template to create a new service, and the variables are in the format of ${{ values.varName }}.
If you are familiar with Helm, YAML, or Go templates (or just about any template tool), you will find this easy to read and understand at no cost whatsoever.
The only item worth mentioning is a file named catalog-info.yaml, which is used by Backstage, so this file must exist; otherwise, you can't register the created service as a component in the portal.
As you can see, in the template, we have already got some baked-in GitHub Actions workflows, one would test on pull requests and push to the main branch, and the other will use ggshield to scan repositories for hardcoded secrets.
In this way, we can put all the CI/CD best practices in the template so that when others launch a new service, they already have everything they need with security features enabled by default.
5.2 The template.yaml File
The template.yaml file defines how the template looks in the portal UI and what it actually does.
It is long and seems overwhelming at first glance, but once you have a closer look at it, you will notice it's pretty straightforward:
the syntax is like a Kubernetes custom resource;
it has two major parts, one is parameters, and the other is steps;
the parameters define required input and their types when using this template;
the steps define what actually happens when you execute this template, and it looks a whole lot just like a GitHub Actions workflow.
Parameters example:
parameters:
  - title: Provide some simple information
    required:
      - service_name
      - owner
    properties:
      service_name:
        title: Name
        type: string
        description: Unique name of the service.
        ui:field: EntityNamePicker
      description:
        title: Description
        type: string
        description: Help others understand what this service is for; optional.
      owner:
        title: Owner
        type: string
        description: Owner of the component
        ui:field: OwnerPicker
        ui:options:
          allowedKinds:
            - Group
  ...
Steps example:
steps:

- id: template
  name: Fetch Skeleton + Template
  action: fetch:template
  input:
  url: ./skeleton
  copyWithoutTemplating: - .github/workflows/\*
  values:
  serviceName: ${{ parameters.service_name }}
  description: ${{ parameters.description }}
  destination: ${{ parameters.repoUrl | parseRepoUrl }}
  owner: ${{ parameters.owner }}
  ...
From the above file, we can infer what exactly it defines:
first, you need to enter two input parameters:
service_nameandowner;then you need to choose a repository location with one extra parameter (
GITGUARDIAN_API_KEY, to be used in CI pipelines);it then fetches the template, renders it, publishes it to GitHub, and registers it in our portal.
5.3 Register the Template
Finally, let's add our template to our portal's catalog so that others can use it.
The most straightforward configuration for the catalog is to declaratively add locations pointing to YAML files containing static configurations. Locations are added to the catalog under the catalog.locations key in the app-config.yaml file:
catalog:
  locations:
    - type: url
      target: https://github.com/IronCore864/backstage-test-template/blob/main/template.yaml
      rules:
        - allow: [Template]
The rule above allows us to add a template from the specified URL.
💡
Remember to restart yarn dev servers!
6 Putting Everything Together
Now that we've got everything ready, it's time to see the magic in action.
Visit http://localhost:3000, and click the "Create" button, choose our template:
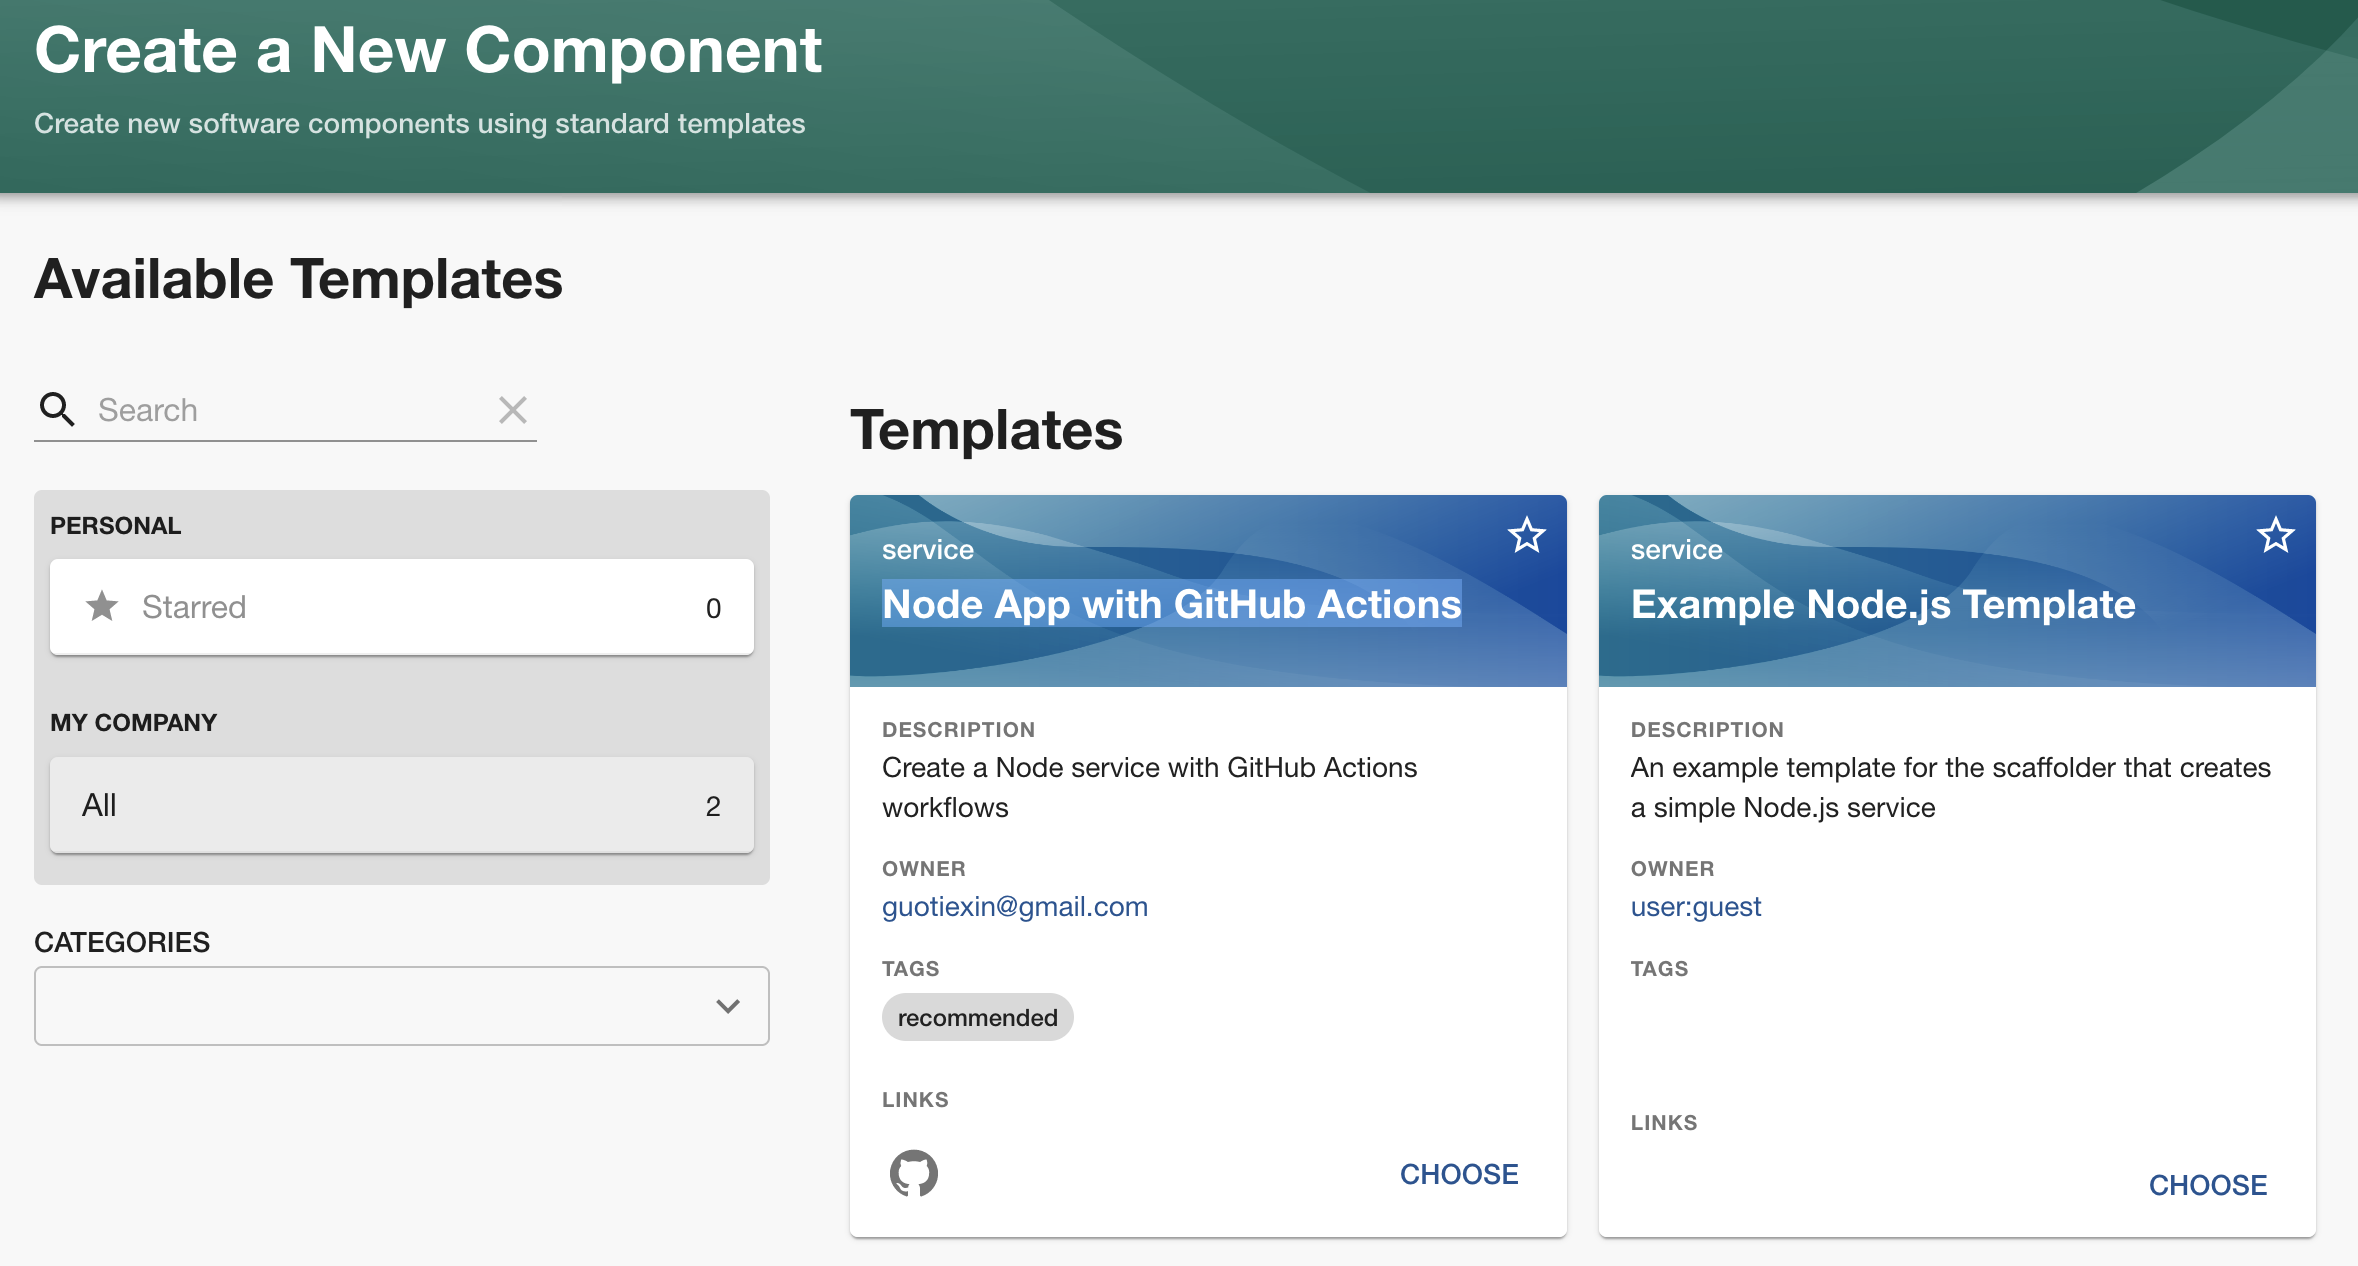
Next, you will be prompted to enter your GitGuardian API key (create one here if needed), because the template I created uses the GitGuardian Shield Action to scan for hard-coded secrets in GitHub CI workflows, which makes security enabled by default for all new projects!
When everything is set, click "next step," and the magic will happen:
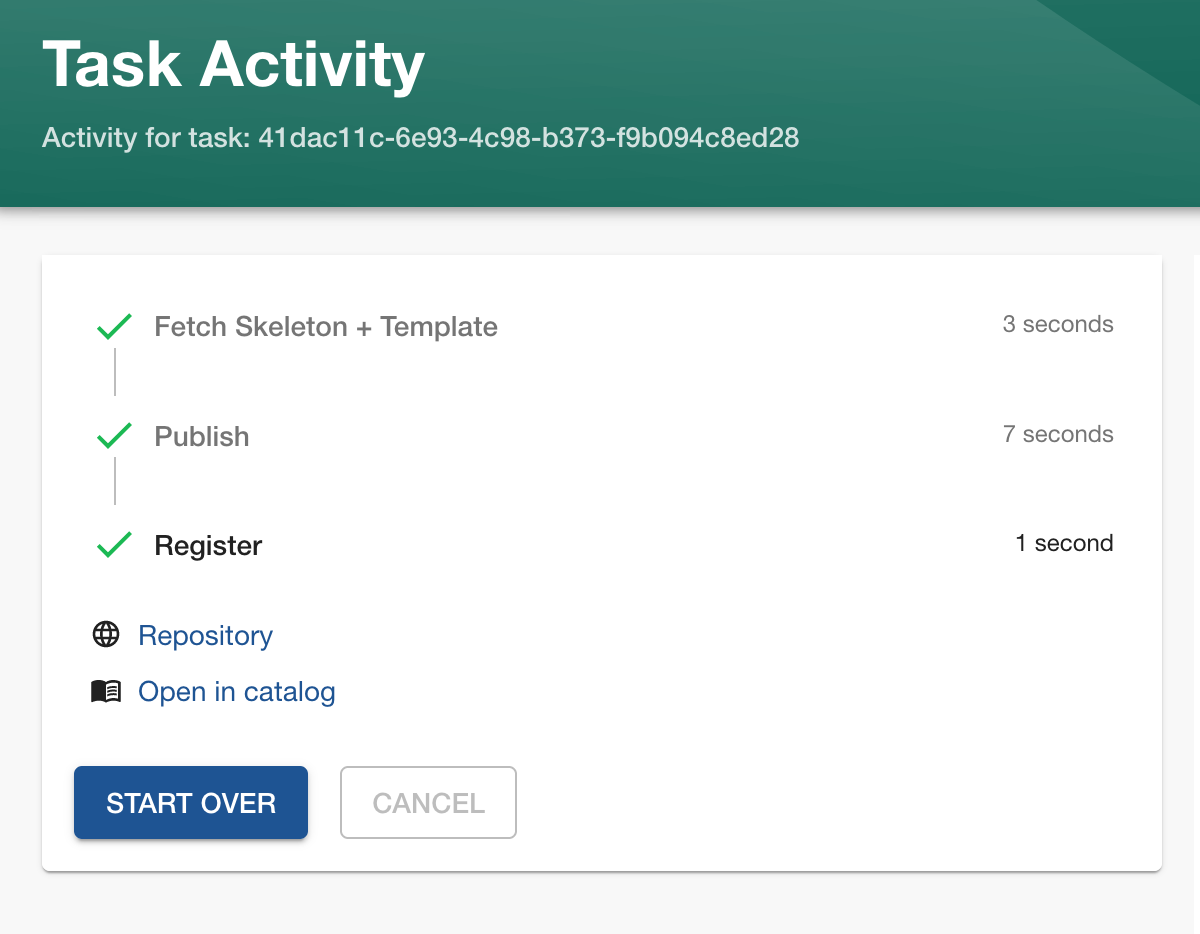
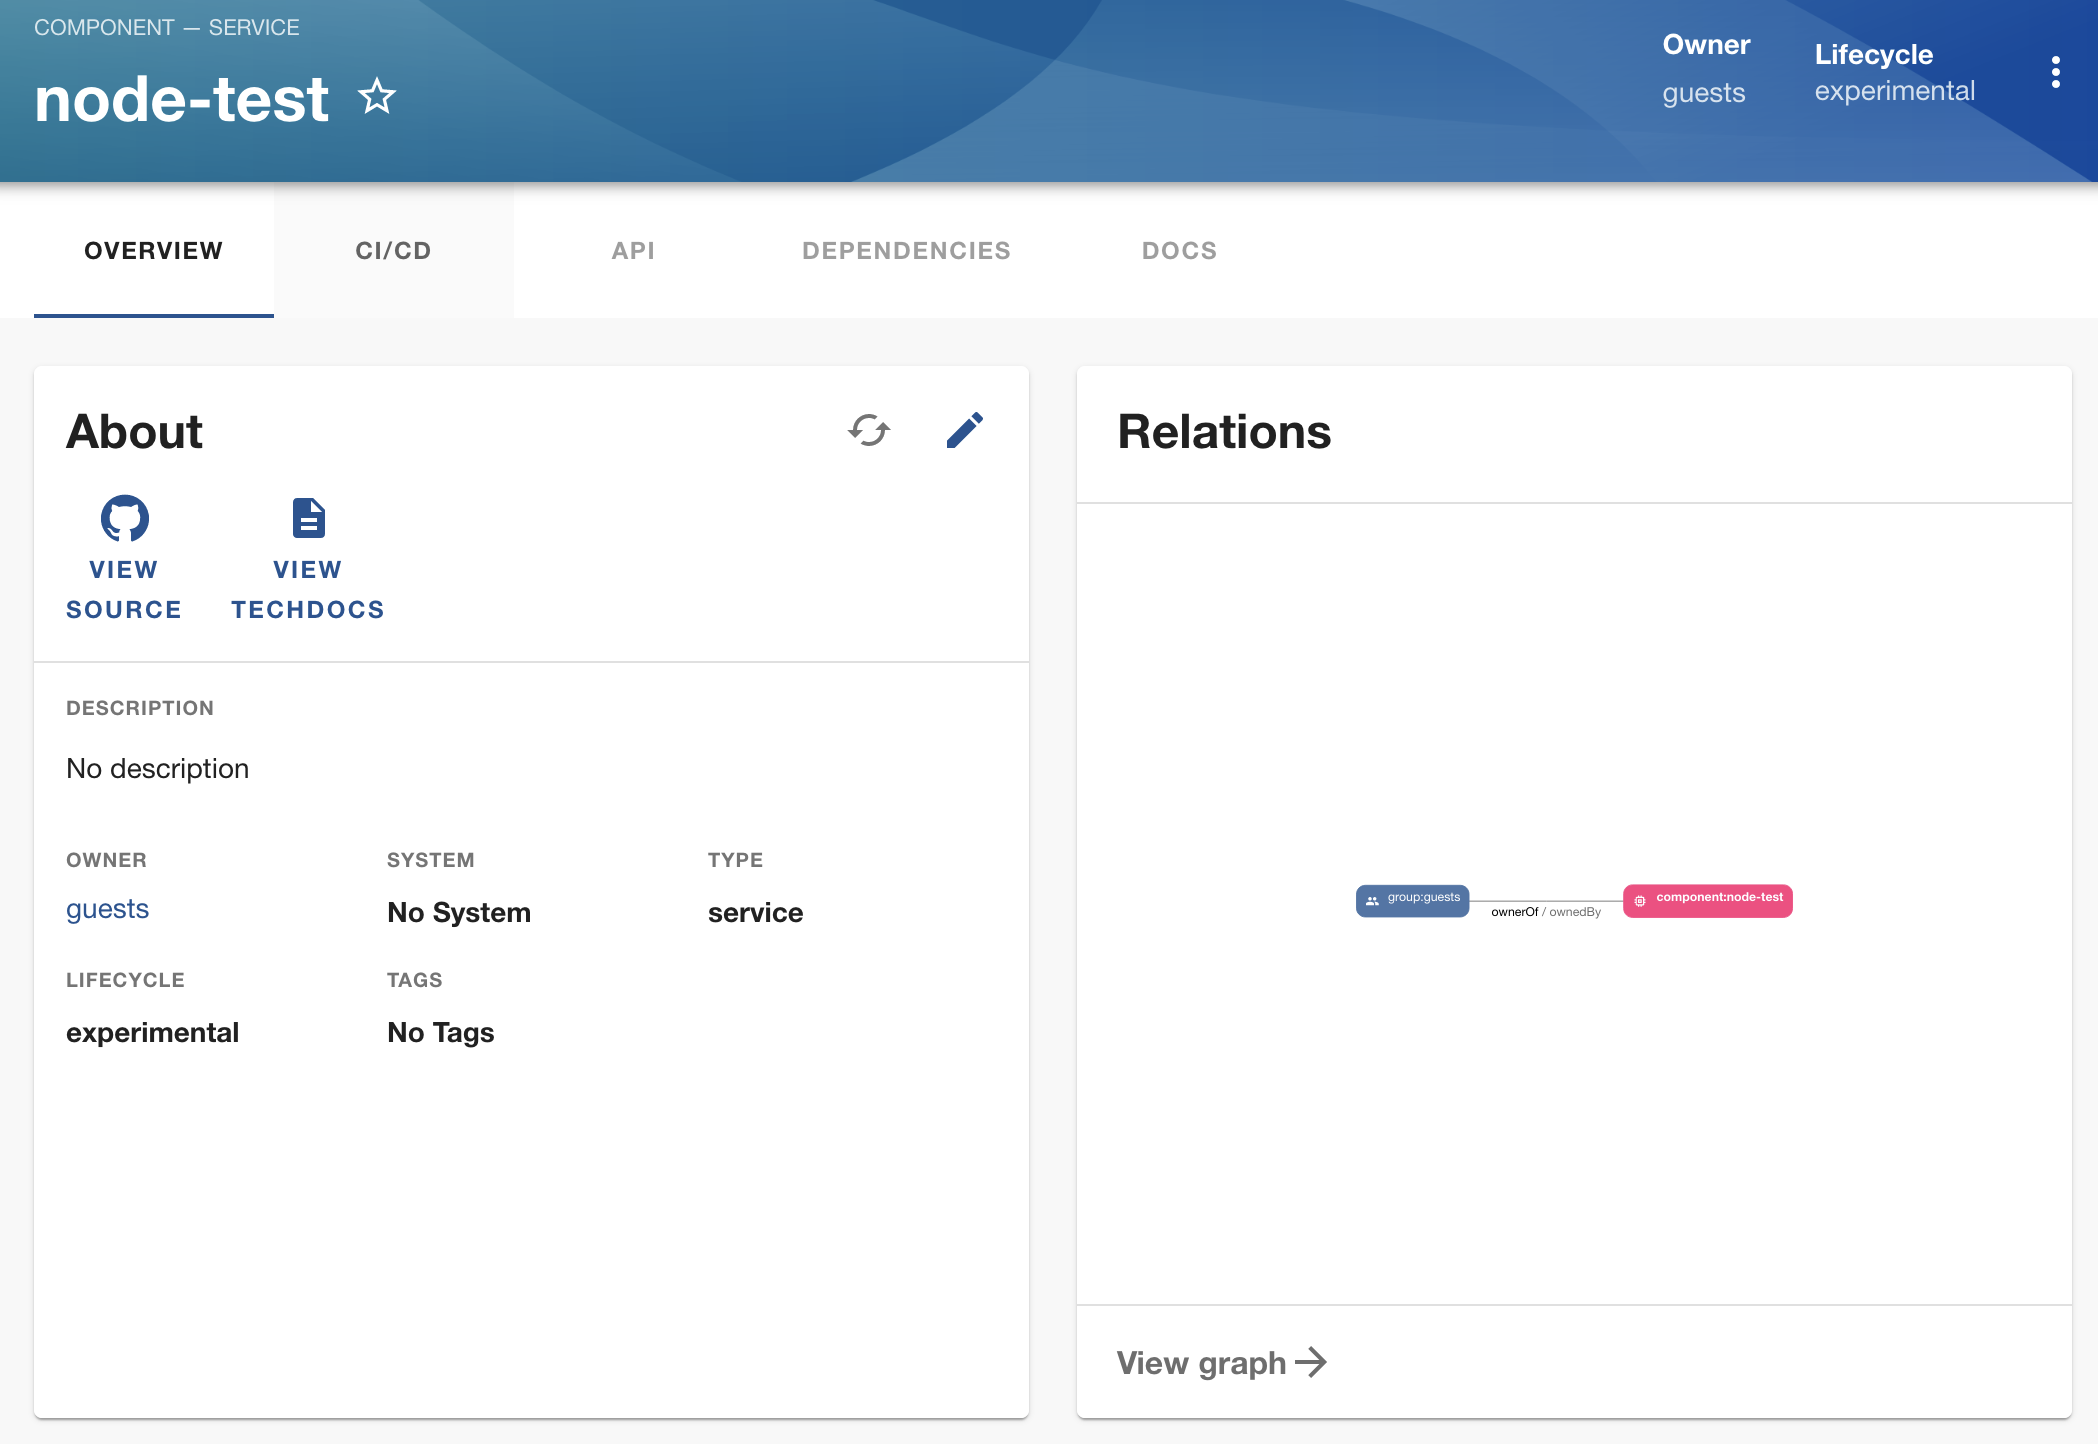
Everything should be created now. We can view it in our catalog:
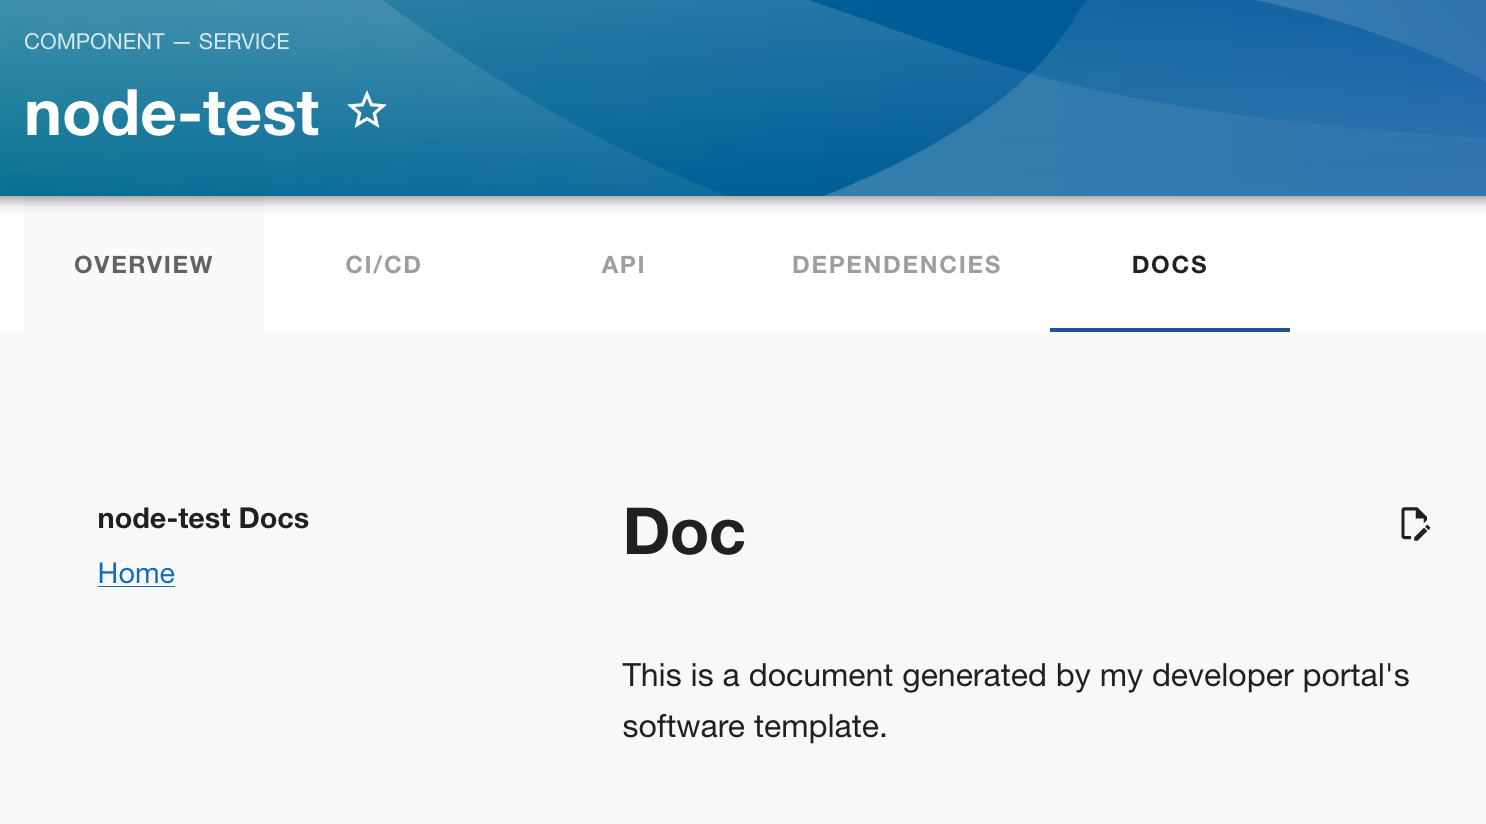
And we've also got documentation created and rendered:
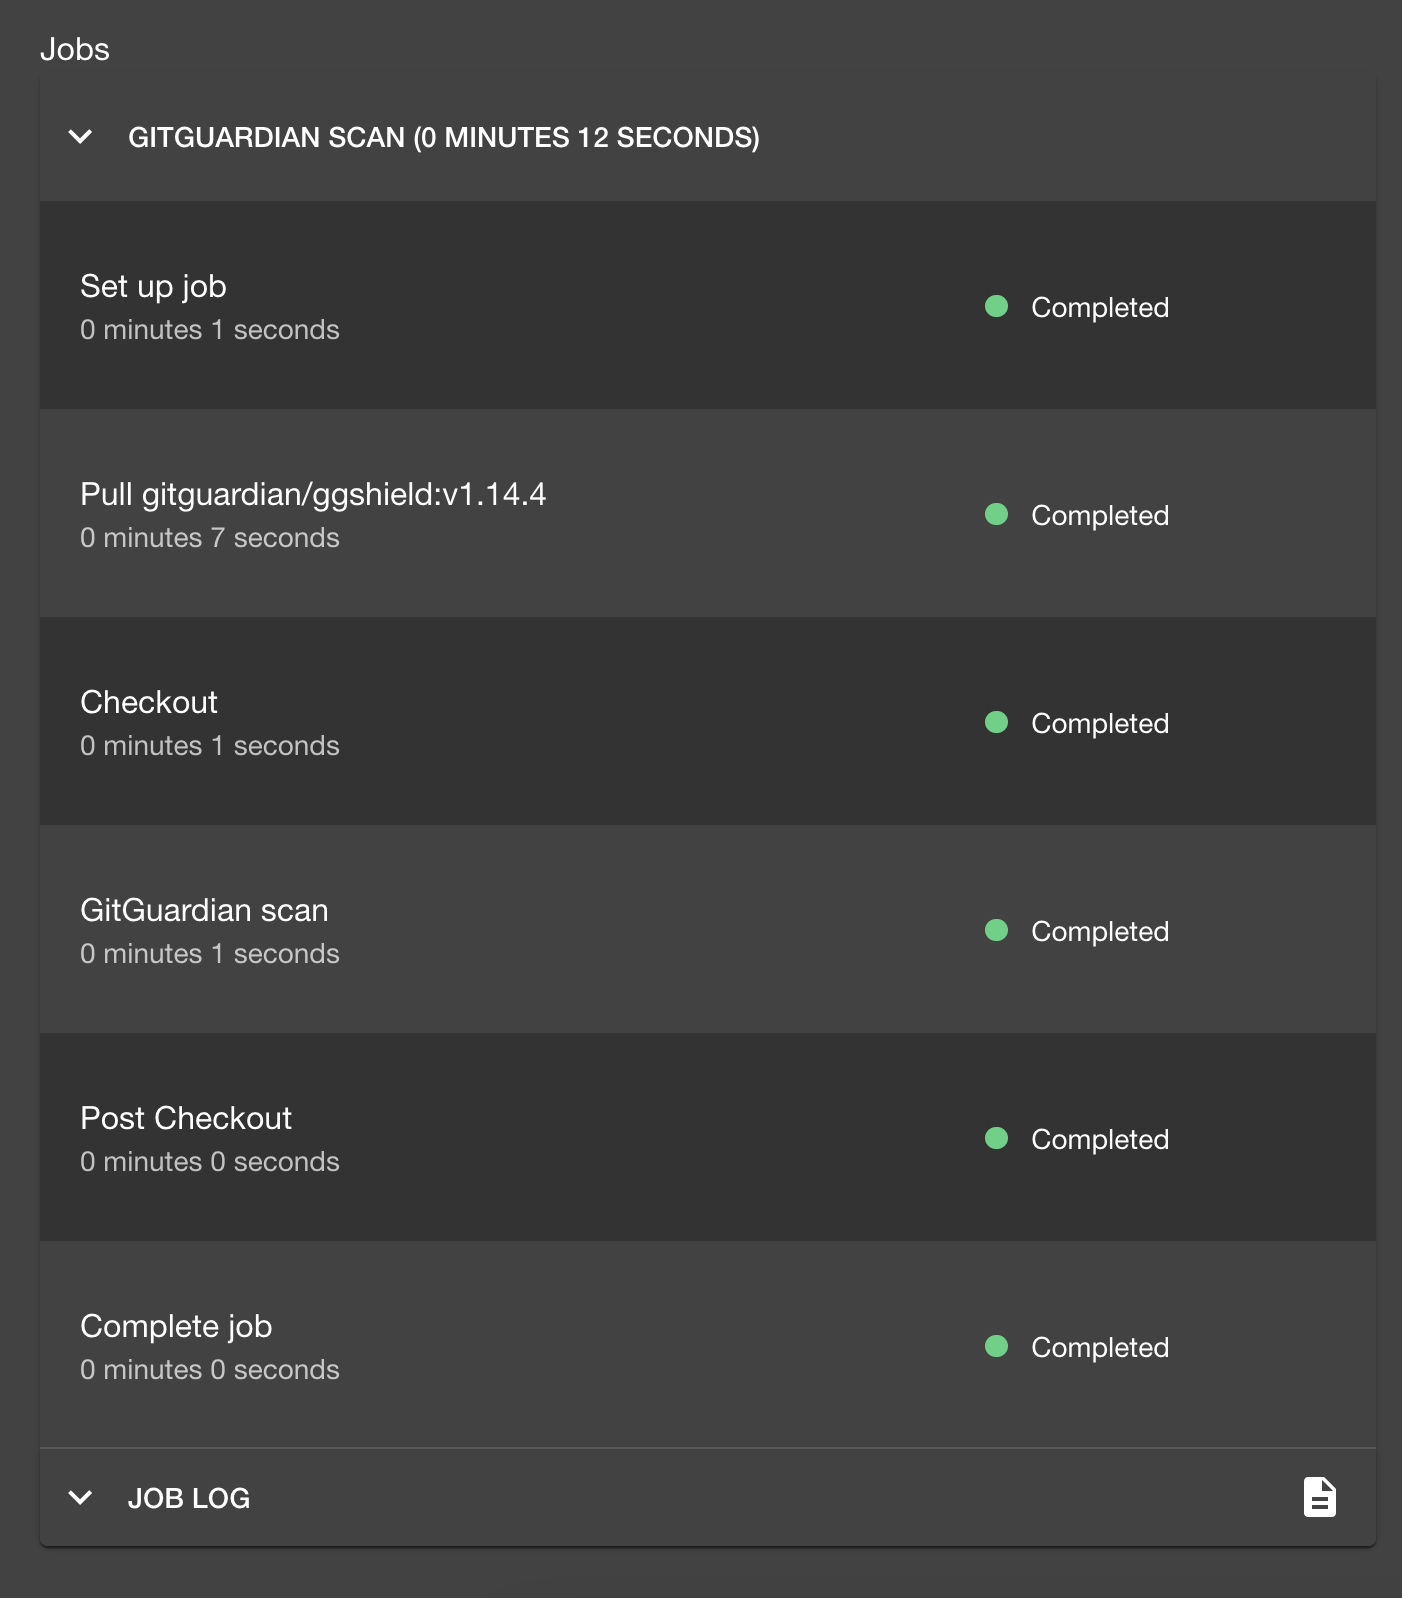
Last but not least, let's check out the CI status:
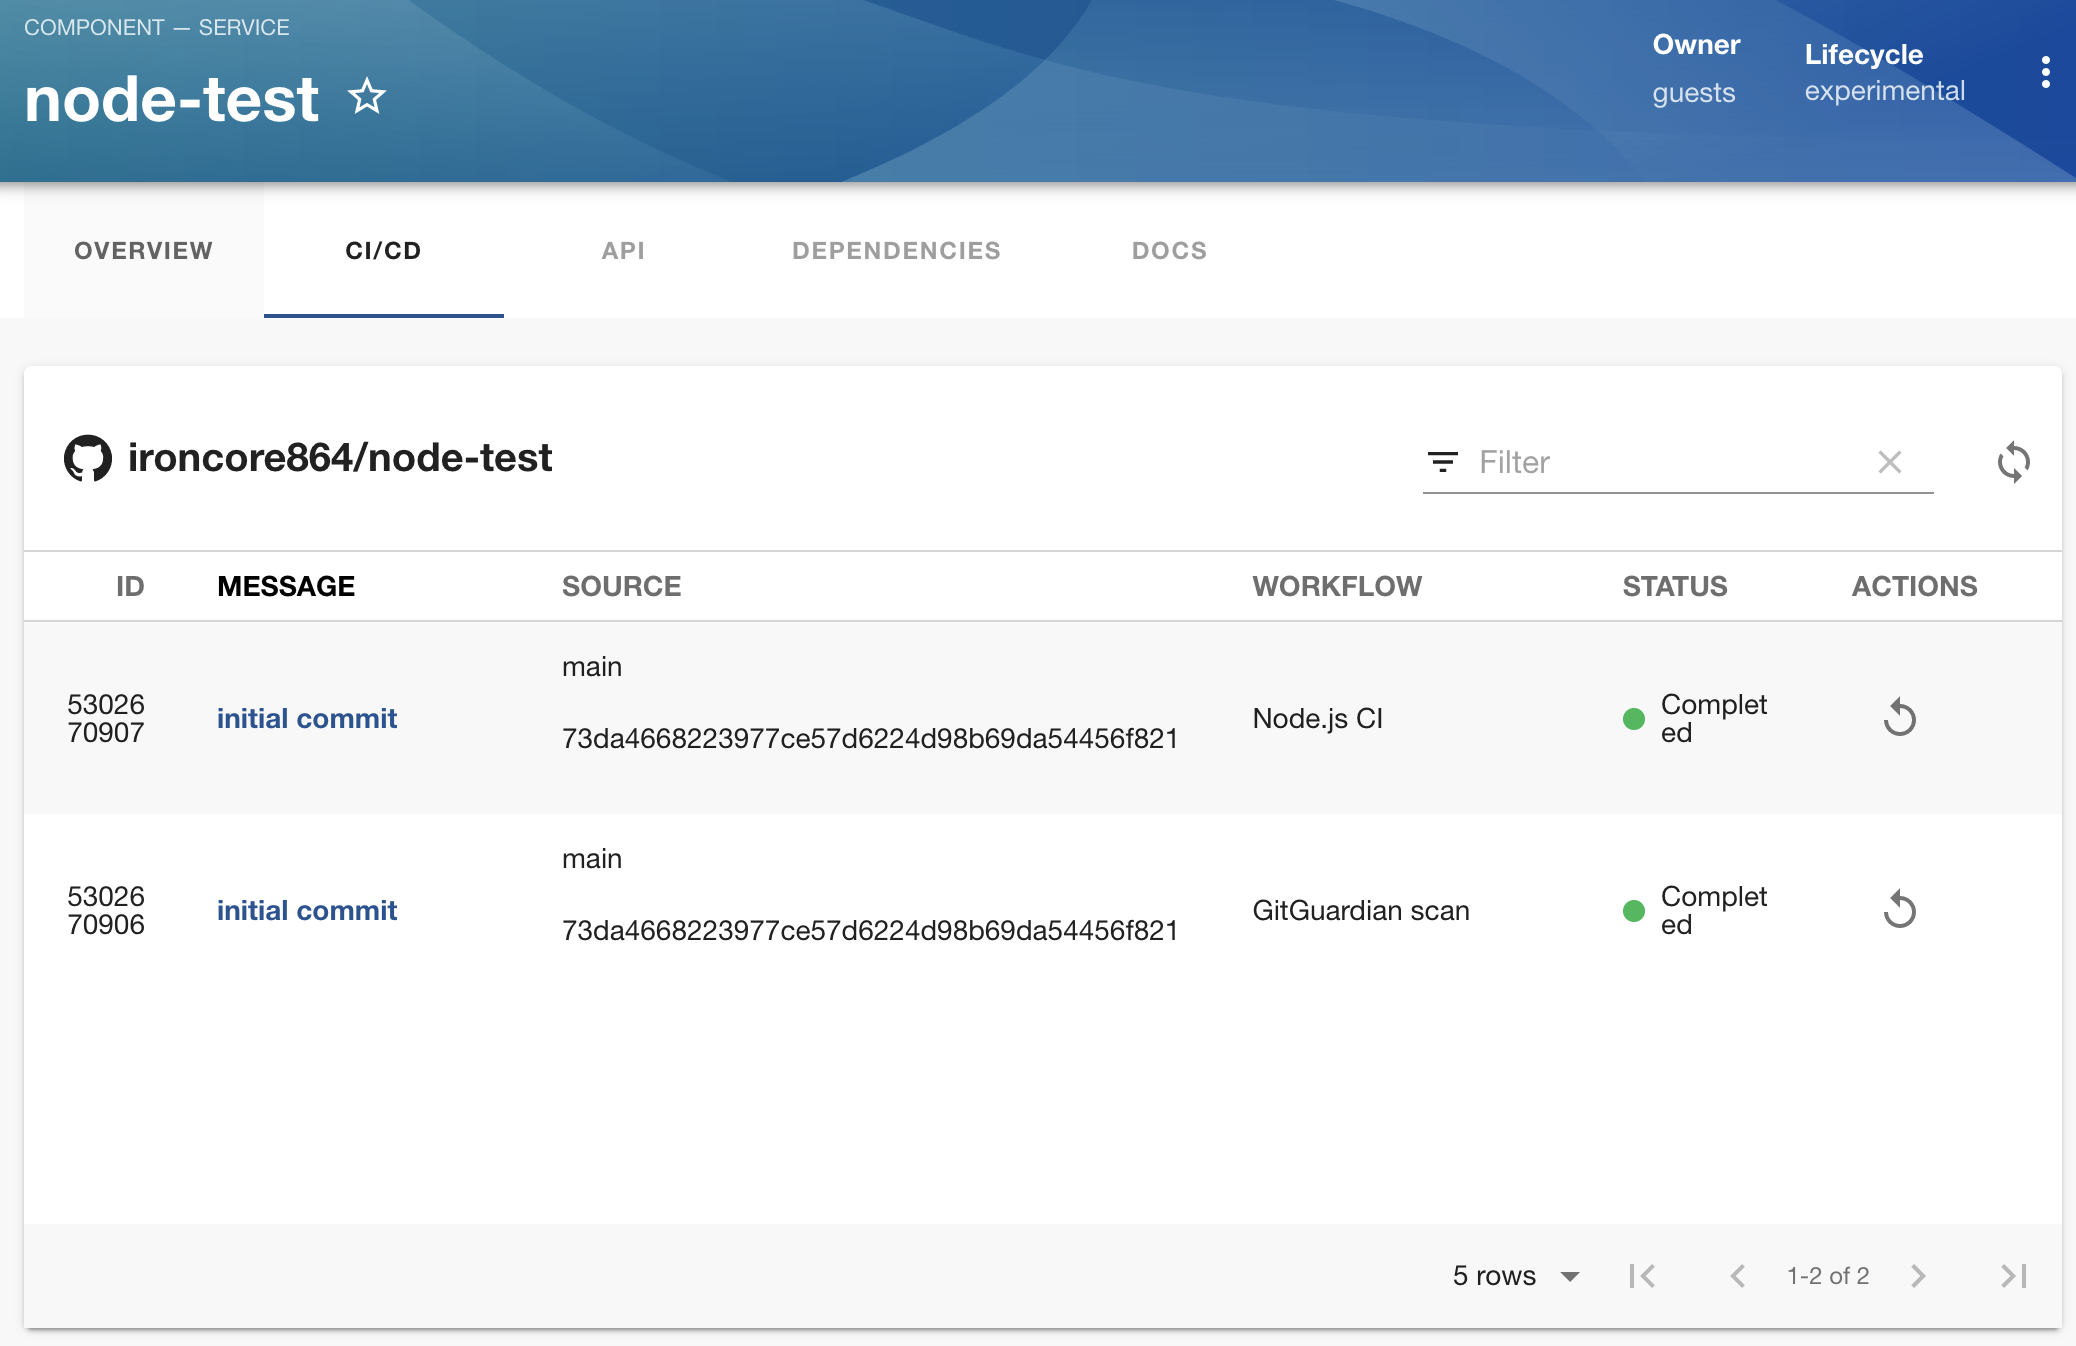
It seems the pipelines are already finished successfully, and we can click on them for more details with detailed steps and logs
If you prefer to view them in the CI software (in this case, GitHub Actions), you can click the corresponding links to jump to them.
For your reference, this repo is the one I created using the template above.
This means no matter what toolchain the team uses, the team members don't have to remember 10 different URLs for 10 different tools, and they don't have to keep those 10 tabs open all the time. When they need some information, any information, they go to the developer portal, and they've got everything, and that's precisely the power of an internal developer portal.
7 Summary
In the first part of the tutorial, we reviewed the features of developer portals, learned how to use the open-source Backstage tool to create a portal ourselves, configured it with GitHub, created a software template, and bootstrapped a service from it.
A developer portal could be much more than this. Imagine if you deploy services in Kubernetes, use Argo CD for GitOps deployment, use HashiCorp Vault for secrets management, and all the integrations are in your portal: when you need to check the deployment status, when you want to see the actual resources in K8s, you don't have to juggle between Vault, ArgoCD and K8s dashboards. Heck, you don't even have to remember their URLs (and to confuse once again staging with prod) or even know the existence of those things because you have the one tool to rule them all, and that's the developer portal.
This tutorial only works for a local quick start; there are many things to think about for production usage. For example, we use static config for now; nothing is persistent; if you restart the dev server, the catalog info is lost. For this, we need to configure Postgres for persistence. Another example, we use yarn dev to start both the frontend and backend; for production usage, you might want to separate the frontend from the backend, deploy them in K8s as containers, and maybe create distinct Ingress rules for them.
In the next part of this tutorial, we will look at the Backstage plugin's mechanism to see how we can expand its power to the next level.
If you enjoy this article, please like, comment, and subscribe. See you in the next part!